In case it’s not already downloaded, the latest version of AlmaLinux may be downloaded from here: almalinux.org/get-almalinux
On the download page, look for the latest version of the DVD ISO. It’s a large file (presently 11GB), but will include everything (including a GUI, if one still wants that), and will be in a format that can be burned to a bootable DVD, copied to a bootable USB memory stick, or even (most importantly) mounted by VirtualBox for an installation.
Within VirtualBox (VB), click the New button, then provide a VM name (using Alma95 might be helpful, since it’s going to be built upon AlmaLinux version 9.5), find the ISO that was just downloaded, and finally check the box to Skip Unattended Installation.
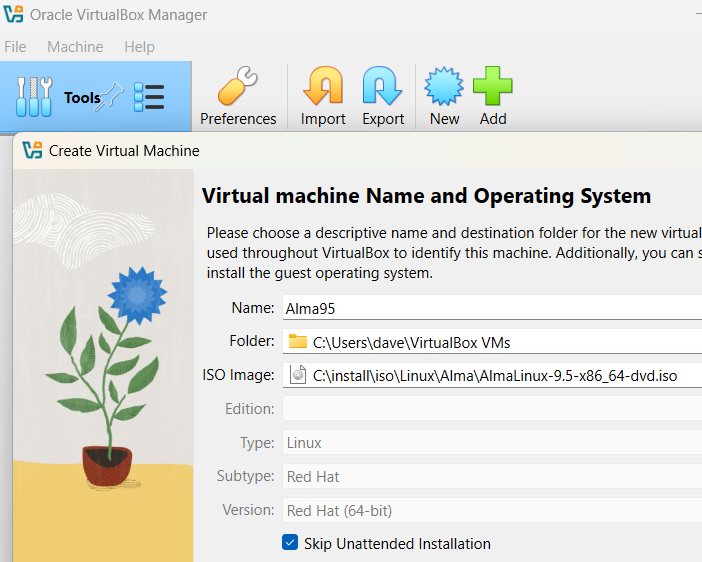
Click the Next button when ready.
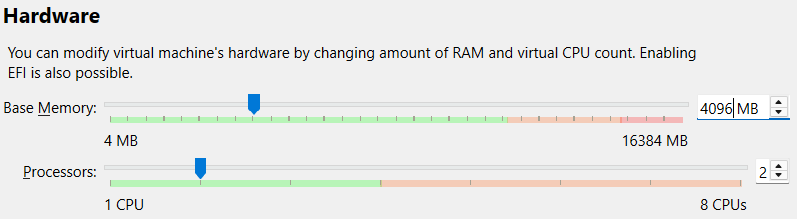
In the Hardware options, since we’re just installing a server, 4GB (or 4096MB) is appropriate (when doing a GUI install, 8GB might be better). Likewise, using 2 virtual CPUs is good for a server (GUI might need 4). Click Next.
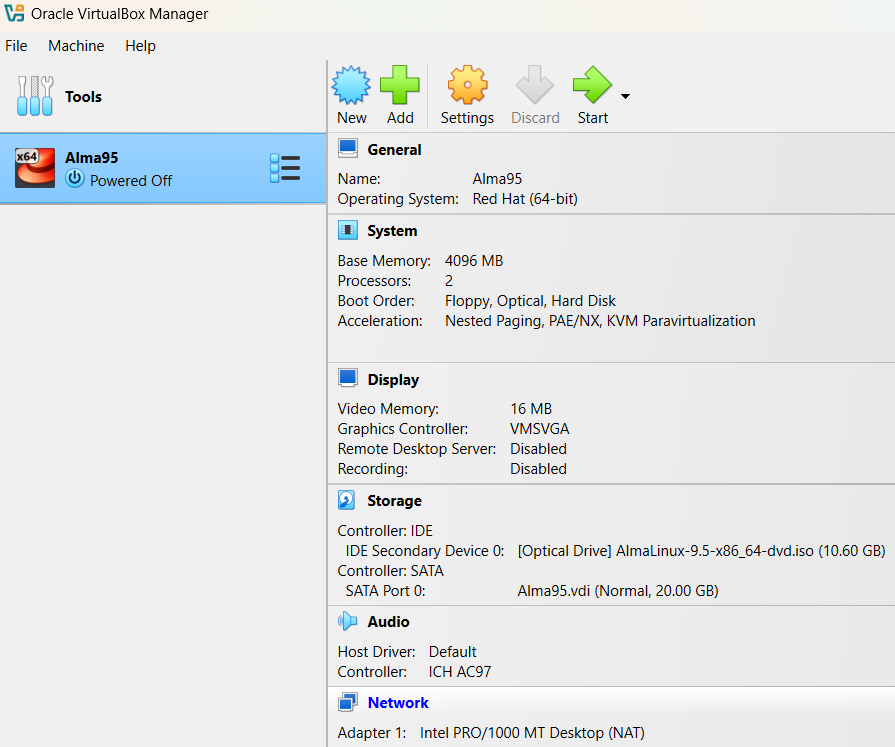
In the Virtual Hard Disk options, since VB’s recognized this as a RedHat 64bit OS, it’ll pick the right disk size, which is likely 20GB. (We can always add more later.) Click Next, then Finish on the Summary page.
Immediately, VB should show the new VM in a Powered Off state.
Important: Before starting it the first time, we need to add a 2nd network interface that’ll allow us to access the VM directly from the host. Highlight the new VM, and double-click the Network heading (showing here in blue):
A Settings window should appear. Click Expert (if not already active). Click the Adapter 2 tab. Check the box for Enable Network Adapter, which should activate the sub-settings. Change Attached to to Host-only Adapter. Make sure Cable Connected is checked.
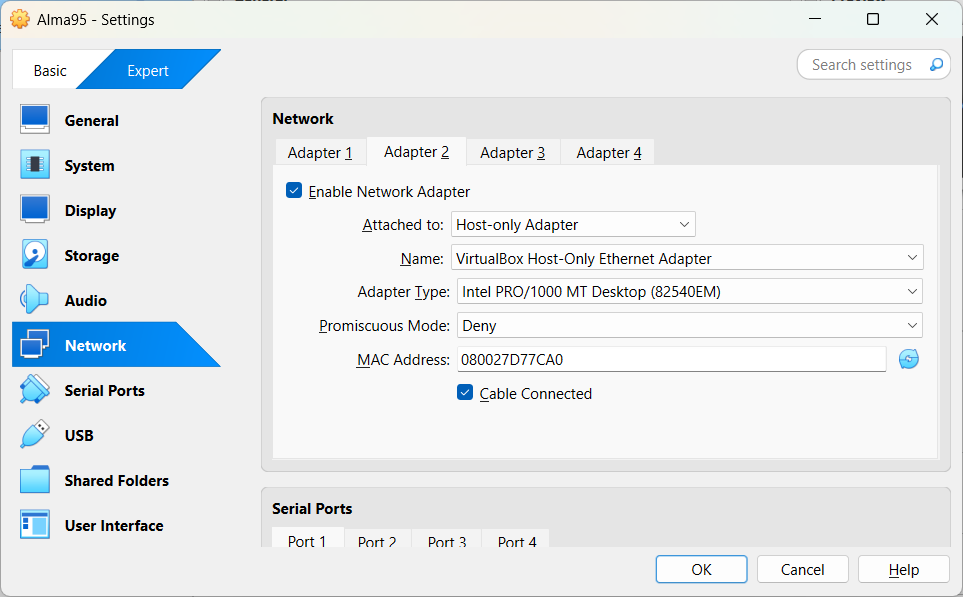
Click OK. The Network section of the Settings window should now show two adapters:

At this point, the VM can be started for the installation.
Double-click that VM, or click the Start button. If running on a laptop, it might be best to plug it into AC power, to ensure that host’s hardware is running at full capacity. On battery, some laptops drop back to power-conservation levels.
While the VM is booting up, there may be a few messages appearing along the right side of the window:
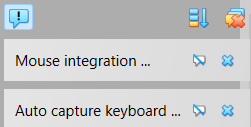
The Mouse integration … notification is referring to the issue that you’ll likely need to click once on the VM window to activate the mouse cursor capture by the OS running in that VM. Click the bubble icon with the slash (showing here to the left of the blue x).
Auto capture keyboard … refers to the default setting within VirtualBox that allows a click of the mouse in the VM window to redirect the keyboard to that VM. The default host key — which returns the control to the host OS — is the right Ctrl key. Click the bubble-slash icon when ready.
To make sure you really, really understand what’s happening with the keyboard, when you first click on that VM window with the mouse, it’ll pop up another related message. Click the box for Do not show this message again before clicking Capture.
Within a short time, a console window should appear for AlmaLinux. Click once within that window, and then use the up/down arrow keys to highlight Install AlmaLinux. (Note: if the mouse cursor gets assigned to the console window, press the right Ctrl key to return control to the main system display. This is the default “Host Key,” but can be reassigned to anything from within VB’s Preferences.)
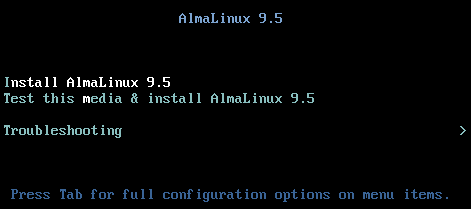
There’ll be a few error-like messages popping up as Alma first tries to run its installer for the first time within this VM. Give it a few minutes, and the installer should appear with “Welcome to AlmaLinux…” title.
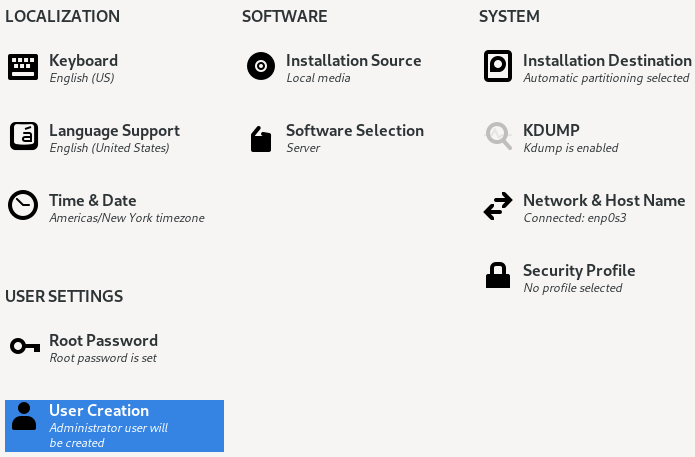
After clicking to Continue, an Installation Summary page will appear. In this initial install, let’s focus on a standard server (non-GUI), capable of running a web-server. This should keep things mostly simple, and allow us to easily test the install by pulling up a local browse to talk with the VM’s web-server.
We’re going to work our way from upper-left to lower-right within the Summary page. Localization should be defaulted to appropriate values.
Under Software, Installation Source should default to Local media.
Click the Software Selection option (which might be showing “Server with GUI”). Under Base Environment (left pane), click Server. The right pane (Additional software for Selected Environment) should change, and allow the choice of Basic Web Server. Click Done (upper-left).
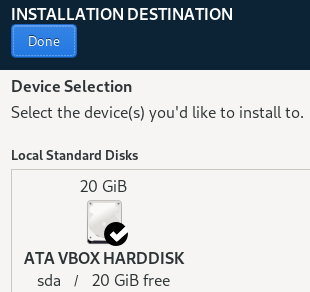
Back in the Summary page, under System, click Installation Destination. In this case, the installer’s just confirming we want to use the default disk. It should be showing the 20GB HD selected during the VM configuration. Make sure it’s checked, and click Done.
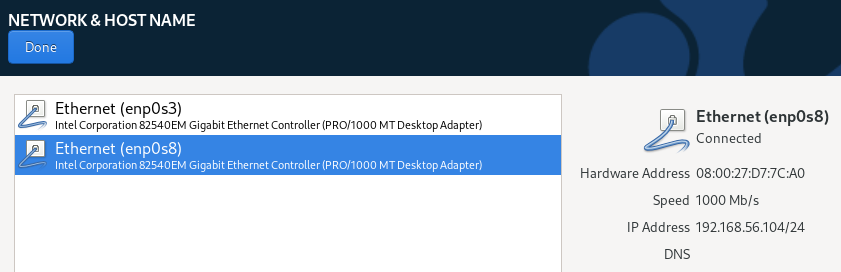
Back in the Summary, still under System, click Network & Host Name. The first adapter in the list will be what the VM uses to connect with the outside world (Internet). The 2nd adapter is internal to the host machine, and should have an IP address similar to 192.168.56.x/24, where the x will be something assigned automatically.
Take note of that IPv4 Address value (for example, 192.168.56.104 — the “/24” is the network mask in CIDR notation… which you can ignore for now). We’ll be using this IP address to access the server’s console later.
It might be good to enter a Host Name at this point, too. Don’t use something like a cartoon character or planet, but rather try something that’ll make sense to others later, such as “Alma95.local” — this’ll tell us which OS is running, and that it’s a local VM. When ready, click the Apply button, and Current host name should update to match.
Click Done when ready.
The last thing to set is under User Settings. We’ll need at least the Root Password set, but it might also be a good habit to get into to go through User Creation. The “root” is the administrator of the system — the account that can do anything. The user should be restricted, kept from messing around with the system.
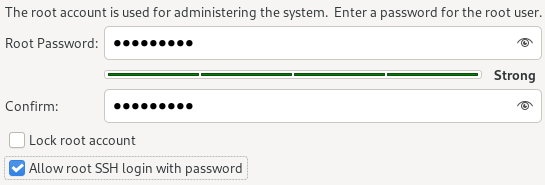
Click Root Password. Enter something easily remembered in the Root Password field. Then, repeat in the Confirm field. As soon as something’s entered in these fields, the Lock root account should uncheck itself (if not, uncheck it manually). Since we’re doing simple, local development with this VM, it’s OK to Allow root SSH login with password. (In a production environment, this would be left unchecked.)
Click Done.
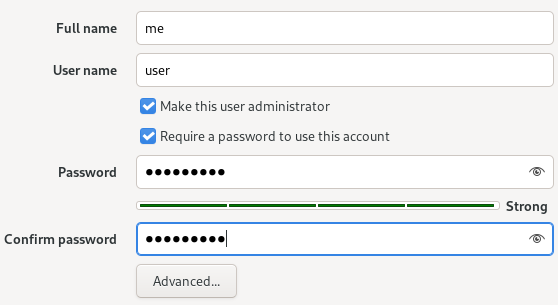
Under User Settings, click User Creation. Fill in Full name with whatever makes sense (this is just going to be text, and is generally unused by anything important). The import part is the User name — choose something you can easily remember (I usually just use “user” or part of my own name).
Check the box next to Make this user administrator (this will allow you to log in with the user account, then request root access without having to log out and back in again as root. Make sure Require a password to use this account is also checked.
For Password (and Confirm password), since this is a local dev VM, just use the same password as for root. (Once again, this is not to be done for a production system.)
Click Done.
One last check of the Summary page should show something like the following:
If anything needs fixing, do it now, but otherwise, click Begin Installation. The Installation Progress page should appear, and show everything it’s doing. When it’s done (which might take up to 15 minutes), the Reboot System button should activate.
Click the Reboot System button, and watch the VM’s console change from the installer to the new VM boot display.
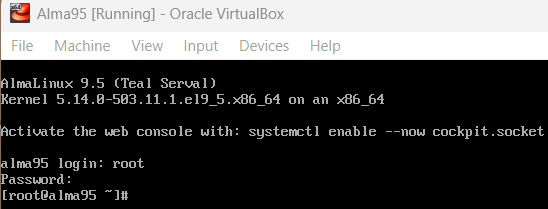
During the first boot, those error-like messages will appear again. These are actually likely part of the OS’s hardware detection components. They should pass quickly, and get us to the login prompt. Use the root account to log in. If we remembered the password, nothing exciting will happen…
Use the ifconfig command to check that both network interfaces are active:
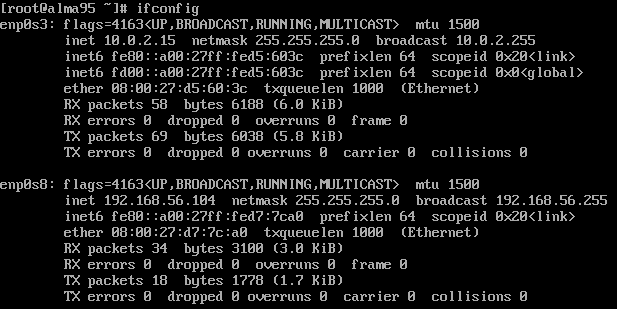
In this case, the first interface (enp0s3) is that which is talking through the laptop to the Internet (“inet 10.0.2.15” represents the IP address it’s using). We can make sure the VM’s able to reach the Internet by pinging something well known, such as Google:
ping -c 4 google.com
The 2nd interface (enp0s8) is using the host-only adapter setup when the VM was created. It uses an IP address of 192.168.56.104 in this example. That’s also the same IP we’ll use to connect to the VM from the host.
Try pinging the VM from the host system’s command prompt:
ping 192.168.56.1
Finally, back in the VM, make sure it’s got the latest updates, using the following command: yum update
Yum’s the RedHat/AlmaLinux tool that manages application installation and operating system updates. In this case, “update” tells yum to check for OS updates.
After yum determines what’s needed, it’ll prompt with a question, “Is this ok [y/N].” In Linux, when prompts like this appear, the default choice is usually in upper-case. So, the default for this question is No, if you were to just press [Enter]. To get yum to start downloading for the update, you need to specifically enter y before pressing [Enter].
The download could take a few minutes, but when it’s done, yum will start installing the packages.
When the download process is done, before the installation starts, there may be a prompt about importing a GPG key. This is a verification key to make sure the source of the downloaded updates is valid. Since this is a development VM, and is working with a fresh set of repository configuration files, it’s likely safe to agree to import this key. Within 30 seconds, transaction checks should complete, and the updates will begin.
The update process could take a while, and may appear to stall, but be patient. This isn’t like Windows; Linux almost always stays in full control and doesn’t require a forced restart in the middle of things.
When the update is complete, the prompt will return. Since it’s likely that there were kernel updates, the system will need to be restarted. The command for this is simply: reboot.
After the system boots again, and before we get into setting up integration between the Windows host system and this AlmaLinux VM, let’s first set up the hypervisor to send a shutdown signal when the VM terminal is closed. This can be done by clicking the close the window in which the terminal is visible. In the Close Virtual Machine prompt that appears, click Send the shutdown signal.
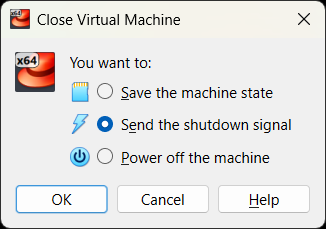
Click OK when ready, and the VM will get the message: shutdown safely. In subsequent runs of this VM, anytime the terminal window is closed, it’ll pop up this same prompt, and will default to the last used setting.